
Welcome to a delightful collection of fall crafts for kids designed to capture the magic of autumn! As the leaves turn golden and the air grows crisp, it’s the perfect time to gather your little ones for some hands-on creative fun. We know you’re looking for activities that are low-cost, low-prep, and perfect for busy parents, teachers, and caregivers. That’s exactly what you’ll find here! These projects are ideal for home, classrooms, rainy days, weekends, or homeschool adventures. They’re crafted to boost fine motor skills, ignite imagination, and introduce seasonal learning, all without requiring a degree in art. Get ready to embrace the cozy season with these easy and engaging autumn art projects for children ages 3–10, with a special focus on our younger preschoolers!
Why Fall Crafts are Great for Little Hands
Beyond the fun, these fall crafts for kids offer fantastic developmental benefits:
- Fine Motor Skill Development: Cutting, gluing, painting, and manipulating small objects all help build dexterity.
- Creativity and Imagination: Open-ended projects allow children to express their unique ideas.
- Seasonal Learning: Connect art activities to the natural world and the autumn season.
- Problem-Solving Skills: Figuring out how to assemble or decorate encourages critical thinking.
- Sense of Accomplishment: Children feel proud displaying their finished creations!
Leaf Crafts: Nature’s Palette
Leaves are nature’s confetti! Gather a variety of fallen leaves for these vibrant projects.
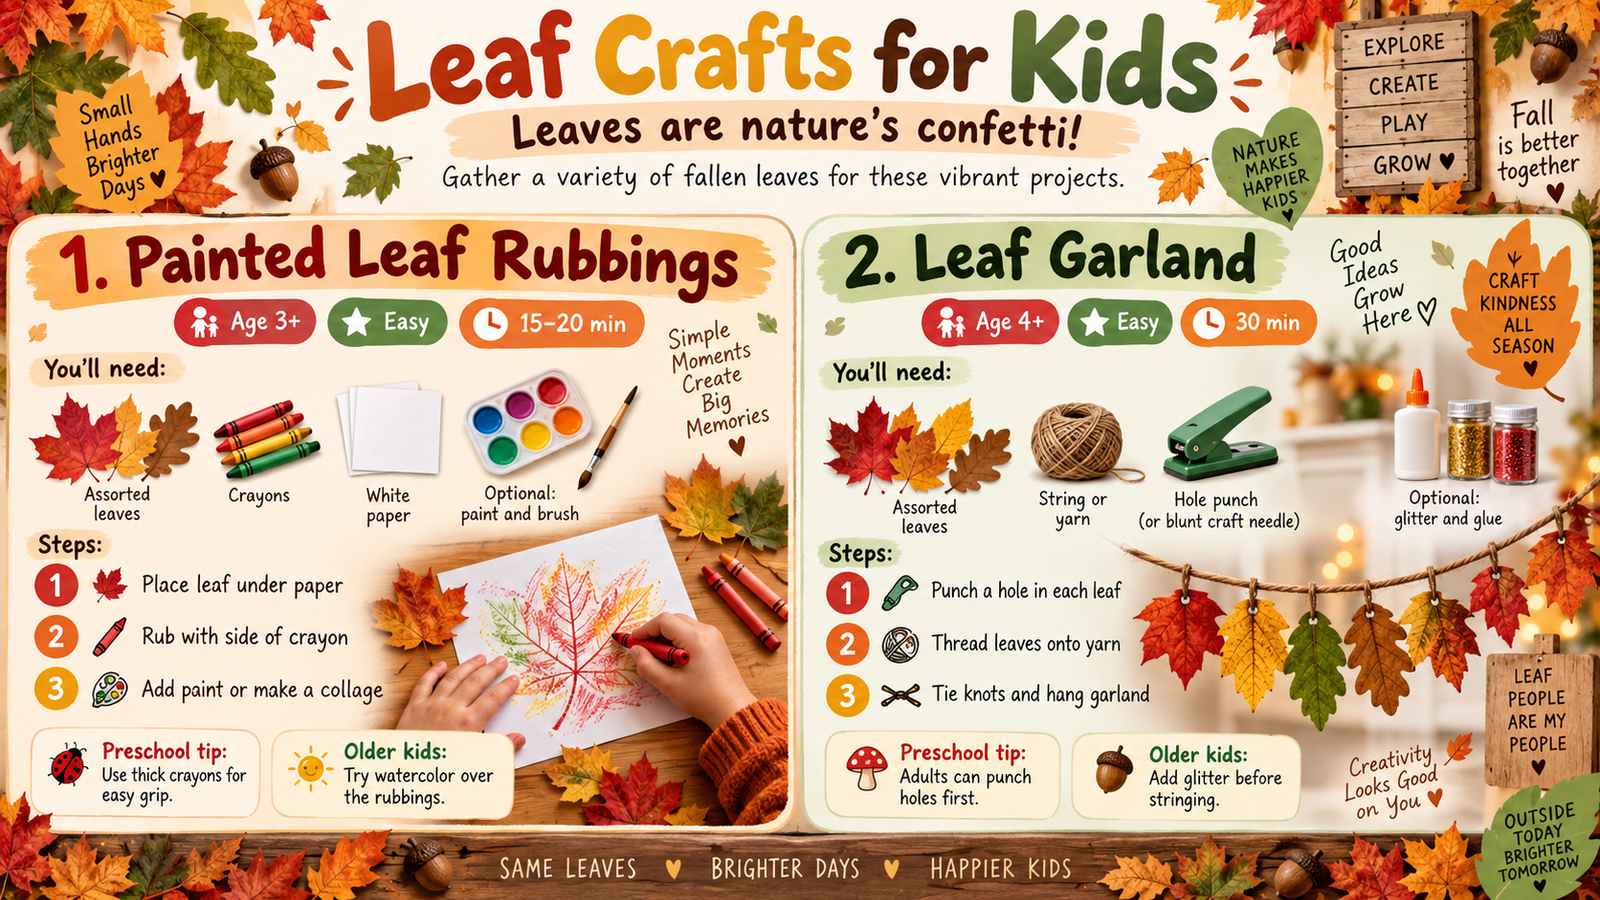
1. Painted Leaf Rubbings
- Recommended Age: 3+ (with adult help for rubbing)
- Supplies: Assorted leaves, crayons (paper removed), white paper, optional: paint, brushes.
- Difficulty: Easy
- Approx. Time: 15-20 minutes
Instructions:
- Place a leaf, vein-side up, under a piece of white paper.
- Rub the side of a crayon over the paper where the leaf is to reveal its texture.
- Create a collage of leaf rubbings or add painted details.
Preschooler Adaptation: Use a thicker crayon for easier grip. For younger ones, let them paint over the leaf directly on paper after it’s been placed and maybe traced around by an adult.
Older Kids: Experiment with different types of paper and rubbing tools. Try adding watercolor washes over the rubbings for a layered effect.
2. Leaf Garland
- Recommended Age: 4+ (with adult help for cutting/threading)
- Supplies: Assorted leaves (fresh or pressed), string or yarn, needle (blunt craft needle for kids) or hole punch, optional: glitter, glue.
- Difficulty: Easy
- Approx. Time: 30 minutes
Instructions:
- Carefully punch a hole through the stem or center of each leaf.
- Thread the leaves onto string or yarn, spacing them out.
- Tie knots between leaves to secure them, or just let them lie close together.
- Hang your beautiful, natural garland!
Preschooler Adaptation: Adults can do the hole punching. Kids can help select leaves and tie simple knots (with guidance).
Older Kids: Add a touch of glue and glitter to the leaves before stringing for extra sparkle. They can also try weaving the yarn through the leaf holes.
Pumpkin Crafts: Gourd-geous Creations
From simple decorating to whimsical art, pumpkins offer endless possibilities!
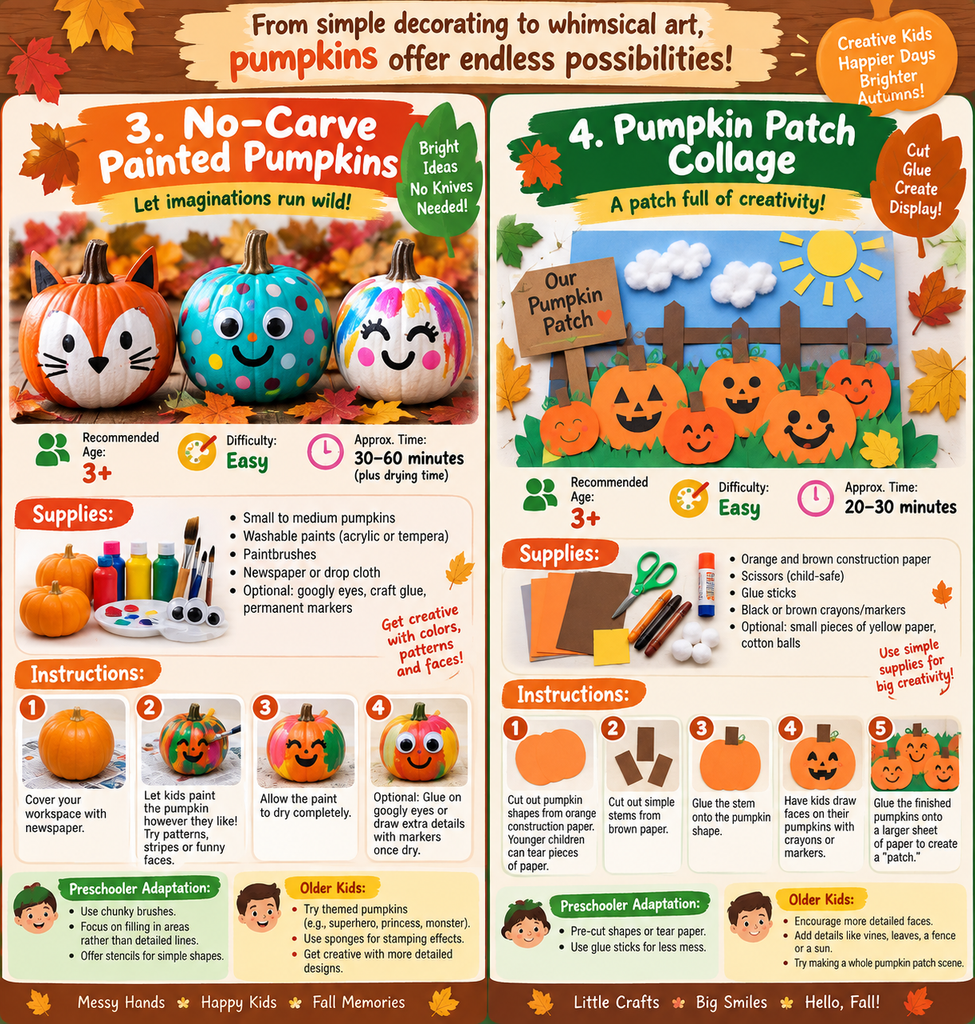
3. No-Carve Painted Pumpkins
- Recommended Age: 3+
- Supplies: Small to medium pumpkins, washable paints (acrylic or tempera), paintbrushes, newspaper or drop cloth, optional: googly eyes, craft glue, permanent markers.
- Difficulty: Easy
- Approx. Time: 30-60 minutes (plus drying time)
Instructions:
- Cover your workspace with newspaper.
- Let kids paint the pumpkin however they like! Encourage patterns, stripes, or creating funny faces.
- Allow the paint to dry completely.
- Optional: Glue on googly eyes or draw extra details with markers once dry.
Preschooler Adaptation: Use chunky brushes. Focus on filling in areas rather than detailed lines. Offer stencils for simple shapes.
Older Kids: Try creating themed pumpkins (e.g., superhero, princess, monster). They can also use sponges for stamping effects.
4. Pumpkin Patch Collage
- Recommended Age: 3+
- Supplies: Orange and brown construction paper, scissors (child-safe), glue sticks, black or brown crayons/markers, optional: small pieces of yellow paper, cotton balls.
- Difficulty: Easy
- Approx. Time: 20-30 minutes
Instructions:
- Cut out pumpkin shapes from orange construction paper. Younger children can tear pieces of paper.
- Cut out simple stems from brown paper.
- Glue the stem onto the pumpkin shape.
- Have kids draw faces on their pumpkins with crayons or markers.
- Glue the finished pumpkins onto a larger sheet of paper to create a “patch.”
Preschooler Adaptation: Pre-cut shapes or tear paper. Use glue sticks for less mess.
Older Kids: Encourage more detailed faces. They can add details like vines with green paper scraps or use cotton balls for a fuzzy effect on their pumpkins.
Paper Crafts: Everyday Materials, Extraordinary Results
Transform simple paper into festive fall decorations.
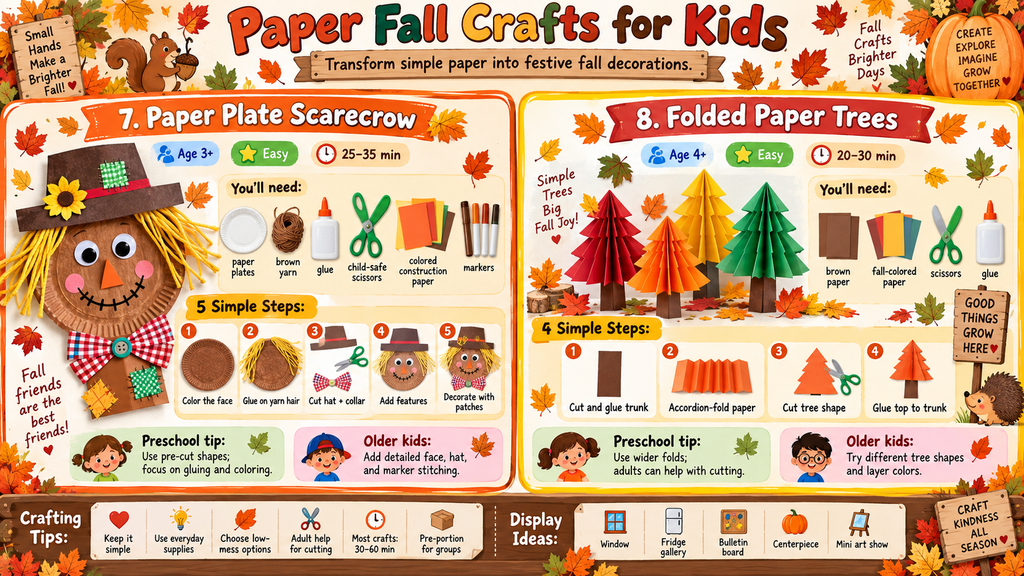
7. Paper Plate Scarecrow
- Recommended Age: 3+
- Supplies: Paper plates, brown yarn, glue, scissors (child-safe), construction paper (red, yellow, green, black, orange), markers.
- Difficulty: Easy
- Approx. Time: 25-35 minutes
Instructions:
- Color the paper plate with brown marker to create the scarecrow’s face. Add eyes, nose, and mouth.
- Cut strips of brown yarn and glue them around the bottom edge of the plate for hair.
- Cut out shapes from construction paper for a hat, patches, and shirt collar.
- Glue the hat onto the top of the plate and the collar around the bottom.
- Add patches to the “shirt” area of the plate.
Preschooler Adaptation: Pre-cut all paper shapes. Kids can focus on gluing and coloring the plate.
Older Kids: Encourage them to draw or cut more detailed features for the face and hat. They can also try adding stitching details with markers.
8. Folded Paper Trees
- Recommended Age: 4+
- Supplies: Brown construction paper (for trunk), green, yellow, red, orange construction paper (for leaves), scissors, glue.
- Difficulty: Easy
- Approx. Time: 20-30 minutes
Instructions:
- Cut a trunk shape from brown paper and glue it to a background sheet.
- Fold sheets of fall-colored paper accordion-style (about 1-inch folds).
- Cut the folded paper into a tree shape (e.g., a round top, a triangular top).
- Glue the folded paper tops onto the trunk.
Preschooler Adaptation: Use wider folds. Adults can help cut the tree shapes.
Older Kids: Experiment with different tree shapes and sizes. They can layer multiple colors for a fuller tree.
Addressing Common Crafting Challenges
Overly Complicated Ideas?
We focus on simple, straightforward steps. If a craft seems too complex, adapt it! For example, instead of intricate cutting, let kids tear paper or use pre-cut shapes. The goal is engagement, not perfection.
Expensive or Unusual Materials?
Our crafts primarily use everyday items: paper, glue, paint, and natural elements. Look around your home or craft bin first. Most supplies are affordable and readily available.
Excessive Mess?
Low-mess options are key! We suggest using glue sticks over liquid glue where possible, washable paints, and covering surfaces. Craft aprons or old t-shirts are also great savers.
Difficulty with Cutting?
For younger children, adult supervision is crucial for all cutting. You can pre-cut shapes, provide safety scissors, or adapt activities to focus on gluing and decorating rather than precise cutting. Consider using torn paper for a textured effect.
Activities That Take Too Long?
We aim for manageable timeframes. Most crafts can be completed within 30-60 minutes, including drying time. Break longer projects into shorter sessions if needed. The focus is on the process, not just the final product.
Whole-Class Preparation?
Many of these crafts are designed for individual or small group work. For large groups, simplify steps and have materials pre-portioned or pre-cut to save time and effort.
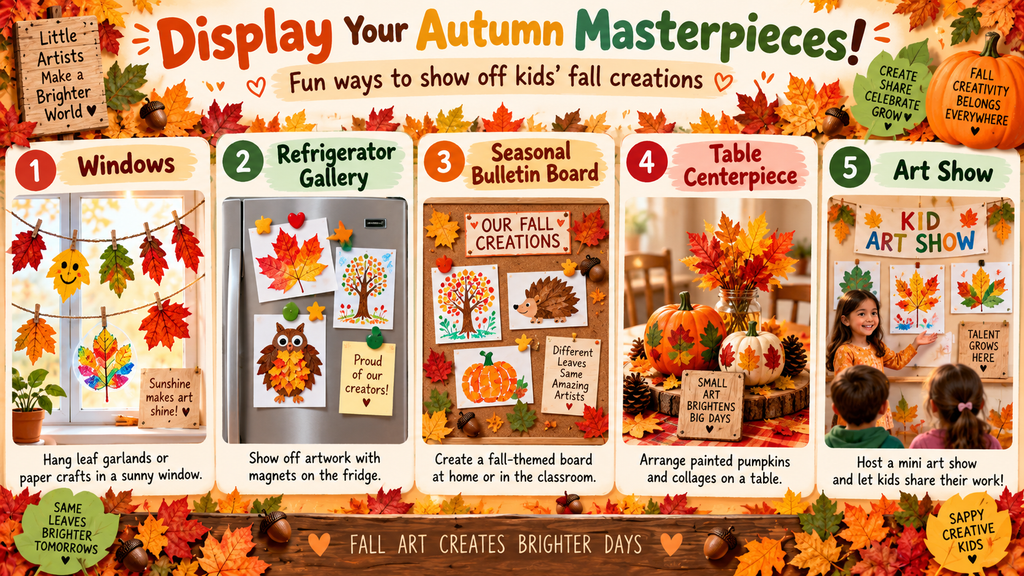
Display Your Autumn Masterpieces!
Once your little artists have finished, give them pride of place! Consider these display ideas:
- Windows: Hang leaf garlands or paper crafts in windows to catch the light.
- Refrigerator Gallery: A classic for a reason – let everyone see the wonderful creations.
- Seasonal Bulletin Board: Create a dedicated fall-themed display in a classroom or home.
- Table Centerpiece: Arrange painted pumpkins or collages as festive decorations.
- “Art Show”: Host a mini-exhibition where children can present their work.
Conclusion: Embrace the Cozy Season!
We hope this collection of fall crafts for kids inspires hours of creative fun and learning. Remember, the most important ingredient is enjoyment! Don’t stress about perfection; focus on the process, the bonding time, and the joy of making something beautiful together. Happy crafting this autumn!