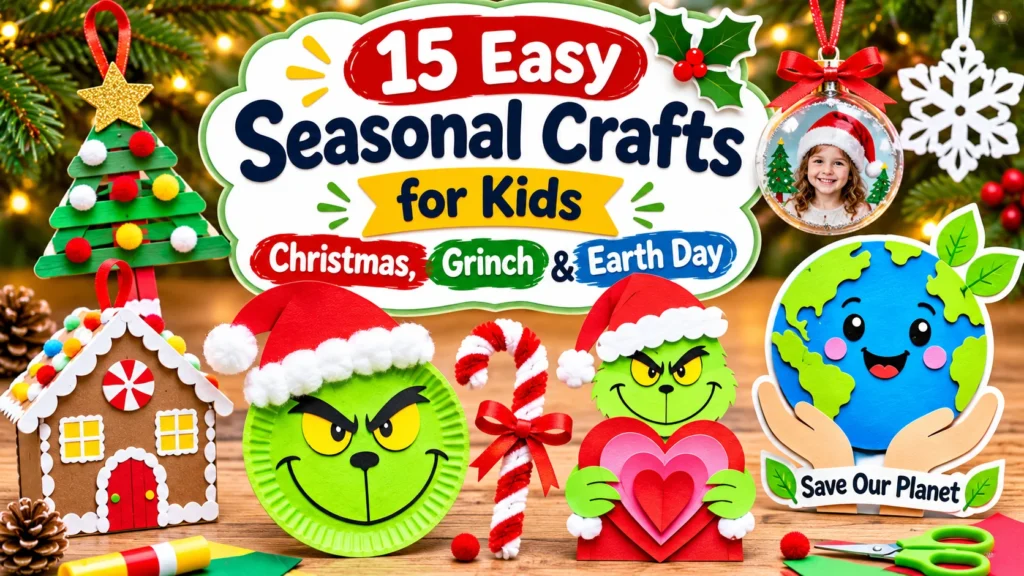
Seasonal crafts are a wonderful way to bring creativity, excitement, and hands-on learning into the classroom. Whether children are decorating Christmas trees, celebrating Grinch Day, or making colorful Earth Day posters, simple projects can help them explore their imagination while creating something meaningful.
Teachers and parents do not need expensive craft kits or complicated supplies to organize memorable activities. Everyday materials such as construction paper, cardboard, popsicle sticks, yarn, and washable paint can become beautiful decorations and personalized keepsakes.
Quick Answer: Some of the easiest seasonal crafts for kids include salt dough handprint ornaments, popsicle stick Christmas trees, paper snowflakes, Grinch kindness hearts, and Earth Day recycling posters. Many projects take approximately 10–30 minutes of hands-on activity time and can be adapted for preschool, kindergarten, and elementary children.
Below are 15 creative craft ideas, with materials, simple instructions, and practical tips for home or classroom use.
Easy DIY Christmas Ornaments for Kids
Making children’s DIY Christmas ornaments is an enjoyable holiday tradition that allows young learners to create decorations they can proudly display or give to family members.
These activities also provide opportunities to practice cutting, drawing, painting, following instructions, and making creative choices.
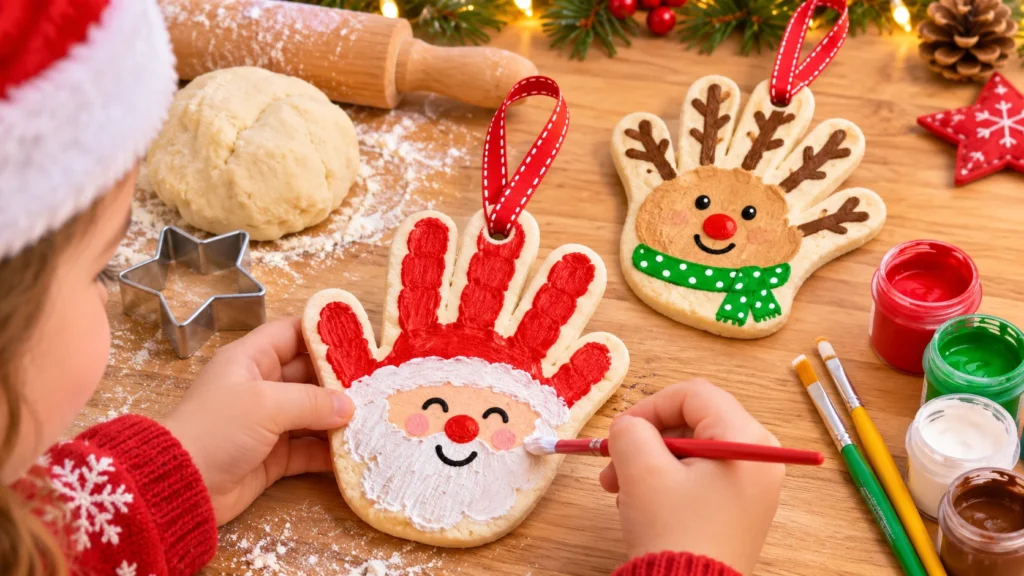
1. Salt Dough Handprint Christmas Ornaments
Best for: Preschoolers and kindergarteners, with adult assistance
Time: 20–30 minutes, plus drying
Salt dough ornaments capture a child’s handprint and turn it into a personalized Christmas keepsake.
Materials:
- 1 cup all-purpose flour
- ½ cup salt
- Approximately ½ cup water
- Rolling pin
- Washable paint
- Ribbon
How to make it:
- Mix flour and salt in a bowl, gradually adding water until a firm dough forms.
- Roll the dough to approximately ¼-inch thickness.
- Help your child press a hand into the surface.
- Cut around the impression and make a hole for hanging.
- Have an adult dry or bake the ornament using appropriate salt dough instructions.
- Once fully dry and cool, decorate it with paint and ribbon.
Creative tip: Write the child’s name and year on the back to make a lasting family keepsake.
Salt dough is not edible and must be kept away from pets. Adults should supervise mixing and handle any baking.
2. Popsicle Stick Christmas Tree Ornaments
Best for: Ages 4–8
Time: 15–20 minutes
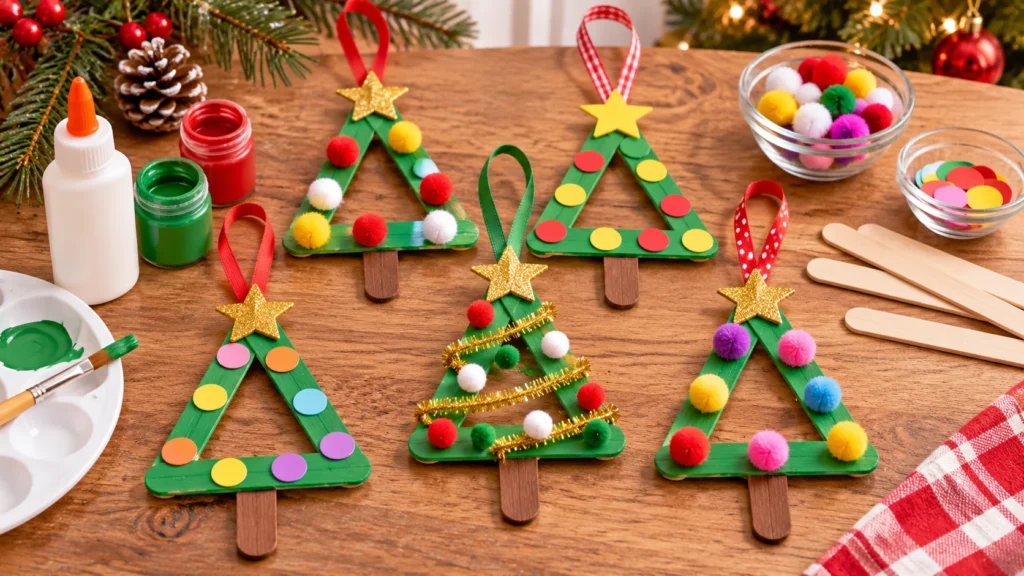
Popsicle stick Christmas trees are colorful, affordable, and easy to prepare for classroom craft sessions.
Materials: Three wooden craft sticks, green paint, craft glue, colorful pom-poms, paper stars, and ribbon.
Instructions:
- Paint three craft sticks green and let them dry.
- Glue the sticks into a triangular Christmas tree shape.
- Decorate the tree with paper circles or pom-poms.
- Attach a paper star at the top.
- Add a ribbon loop for hanging.
Teacher tip: Prepare the triangular frames before class so younger children can focus on painting and decorating.
3. Easy Paper Snowflake Ornaments
Best for: Ages 5–10
Time: 10–15 minutes
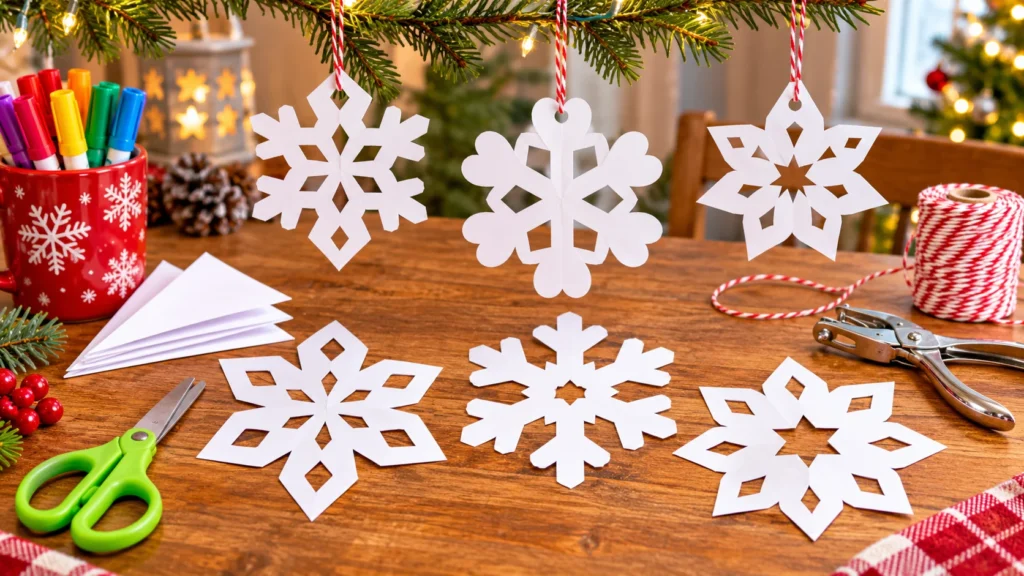
Paper snowflakes are classic children’s craft ornaments that encourage creativity and introduce the concept of symmetry.
Materials: White paper, child-safe scissors, crayons, string, and a hole punch.
Instructions:
- Fold a square piece of paper in half several times.
- Cut small shapes along the folded edges.
- Carefully unfold the paper to reveal a snowflake.
- Decorate with crayons or markers.
- Attach string and hang the decoration.
Learning connection: Ask children to compare the shapes on opposite sides of their snowflakes.
Younger children can decorate snowflakes that an adult has already cut.
4. Reindeer Handprint Christmas Ornaments
Best for: Ages 3–7
Time: 15–20 minutes
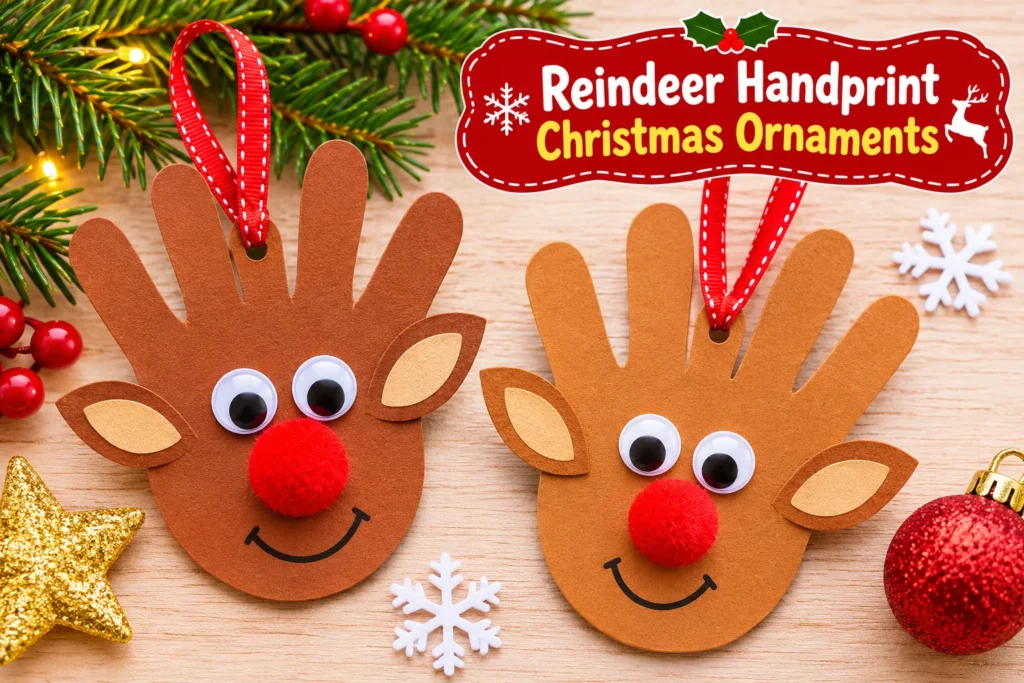
Handprint reindeer ornaments combine creativity with personalized holiday memories.
Materials: Brown construction paper, red paper, markers, glue, scissors, and ribbon.
Instructions:
- Trace a child’s hand onto brown paper.
- Cut around the handprint.
- Turn the paper shape into a reindeer design using the fingers as antler-like features.
- Attach a small red paper nose.
- Draw the eyes and add festive details.
- Glue a ribbon loop to the back.
Personalization idea: Write the child’s name and the year on the ornament.
These decorations make thoughtful handmade gifts for parents and grandparents.
5. Yarn-Wrapped Christmas Star Ornaments
Best for: Ages 5–10
Time: 15–25 minutes
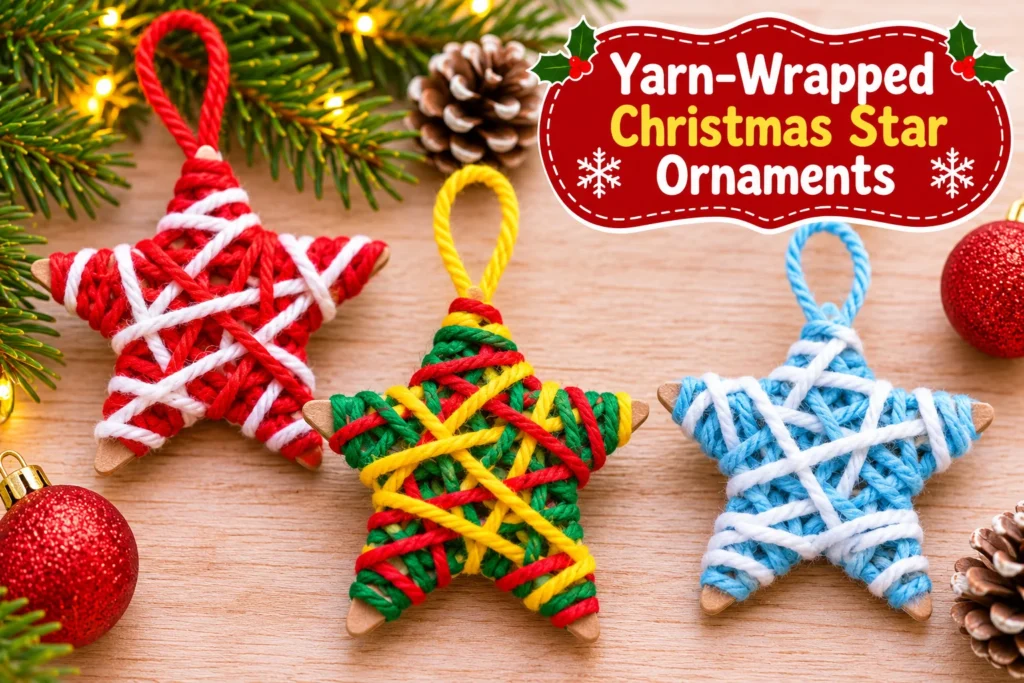
Yarn-wrapped stars are simple decorations that allow children to experiment with color combinations and patterns.
Materials: Thick cardboard, colorful yarn, scissors, and craft glue.
Instructions:
- Draw a large star on cardboard.
- Cut out the star with adult assistance when necessary.
- Attach one end of the yarn to the back.
- Wrap the yarn around different sections of the star.
- Secure the remaining yarn and add a hanging loop.
Classroom benefit: Wrapping yarn provides opportunities to practice bilateral coordination and hand control.
For younger children, use larger cardboard stars to make wrapping easier.
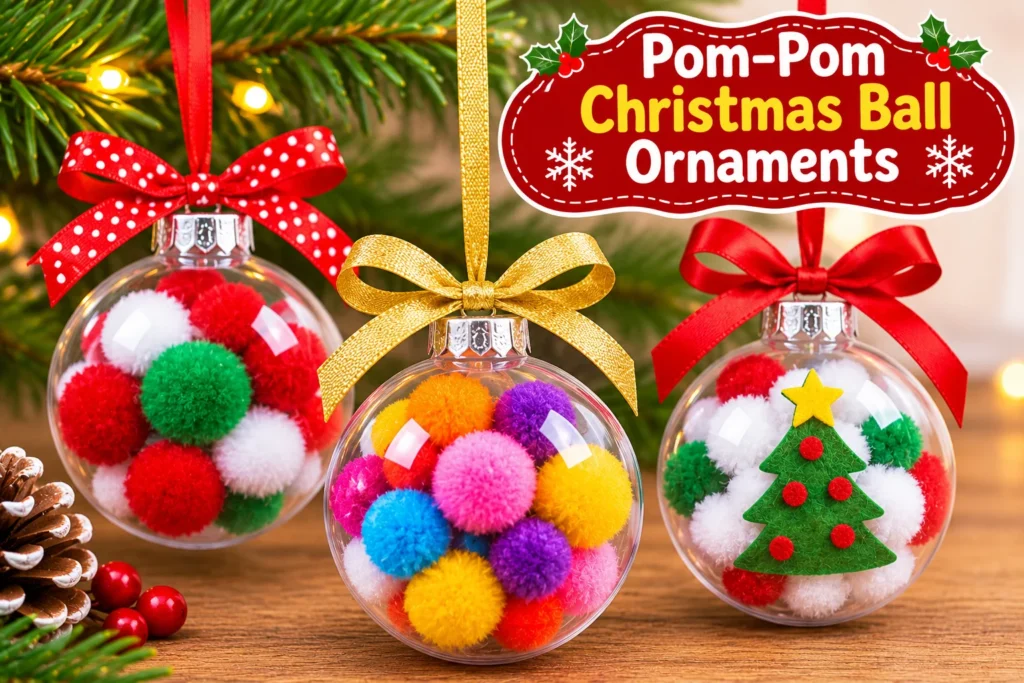
6. Pom-Pom Christmas Ball Ornaments
Best for: Ages 4–8, with supervision
Time: 5–10 minutes
These colorful ornaments are ideal for short classroom activities because children can complete them without painting or complicated assembly.
Materials: Clear, shatterproof fillable ornaments, appropriately sized colorful pom-poms, and ribbon.
Instructions:
- Open the plastic ornament.
- Let children choose two or three pom-pom colors.
- Fill the ornament with the decorations.
- Securely close it.
- Attach a festive ribbon.
Creative variation: Ask children to make color patterns inside their ornaments.
Avoid small pom-poms with children who may put objects in their mouths, and supervise the activity carefully.
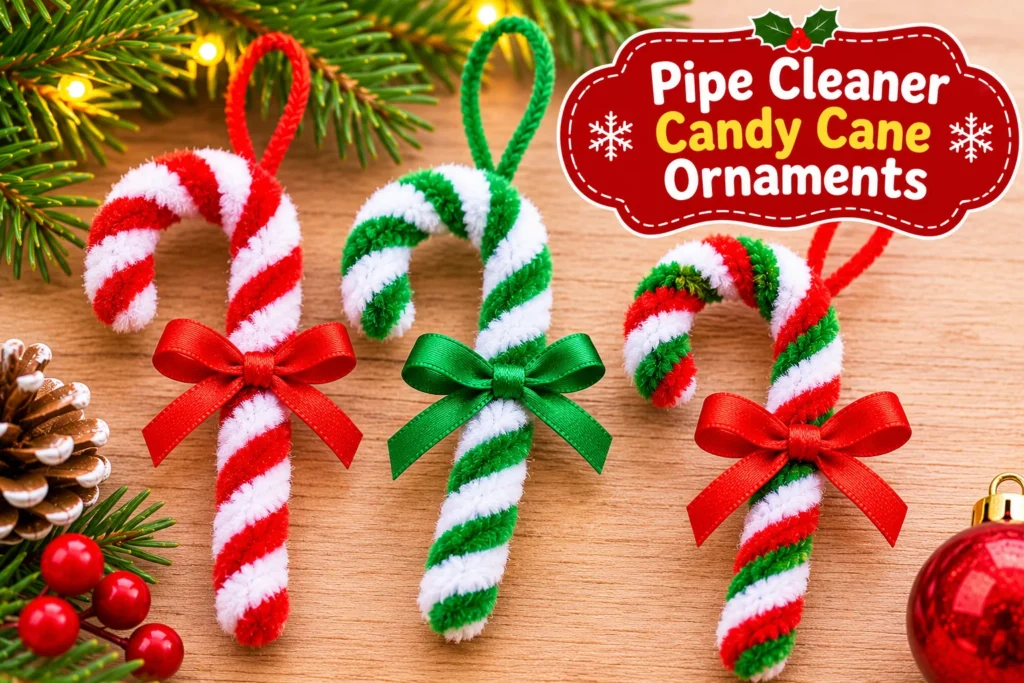
7. Pipe Cleaner Candy Cane Ornaments
Best for: Ages 5–9
Time: 10–15 minutes
Candy cane decorations are among the simplest DIY ornaments for kids because they require very few materials.
Materials: Red and white pipe cleaners, ribbon, and child-safe scissors.
Instructions:
- Place one red and one white pipe cleaner side by side.
- Twist them together to create a striped pattern.
- Bend the twisted piece into a candy cane shape.
- Have an adult secure or fold away any sharp wire ends.
- Attach ribbon for hanging if needed.
Learning connection: Practice identifying repeating color patterns as children twist the pipe cleaners together.
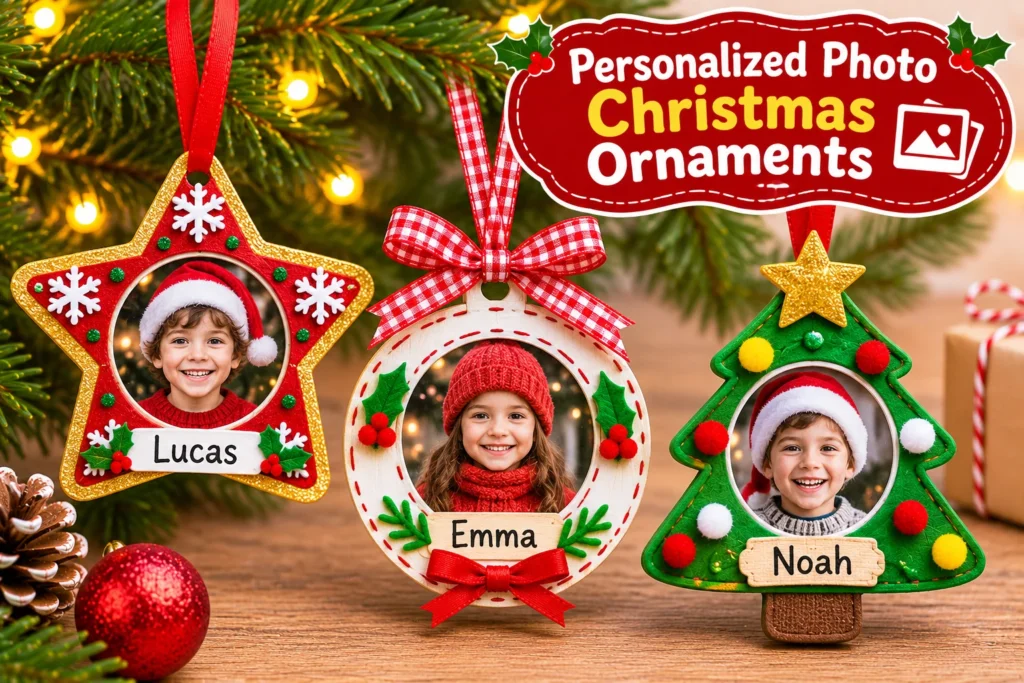
8. Personalized Photo Christmas Ornaments
Best for: Ages 4–10
Time: 15–20 minutes
Photo ornaments create meaningful Christmas gifts while allowing children to personalize their work.
Materials: Small printed photographs, cardboard, decorative paper, craft glue, markers, and ribbon.
Instructions:
- Cut a circle or star from sturdy cardboard.
- Glue a small photograph in the center.
- Decorate the border with colorful paper pieces.
- Write the child’s name and year on the back.
- Attach a hanging ribbon.
Teacher tip: Prepare photographs and cardboard shapes before the activity to save classroom time.
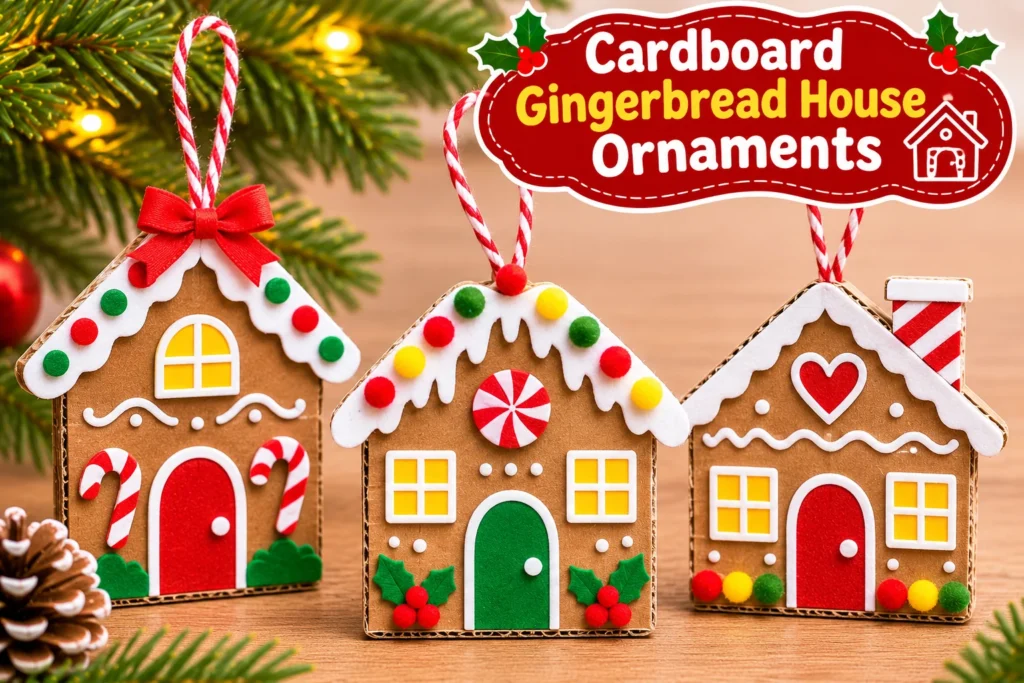
9. Cardboard Gingerbread House Ornaments
Best for: Ages 5–10
Time: 20–30 minutes
Gingerbread-inspired cardboard decorations let children design festive miniature houses without preparing or decorating food.
Materials: Cardboard, brown paper, white paper, colorful markers, glue, and string.
Instructions:
- Draw and cut a small house shape from cardboard.
- Cover it with brown construction paper.
- Add white paper along the roof to resemble icing.
- Decorate with colorful candy-inspired shapes.
- Attach a hanging string.
Creative variation: Let children invent different windows, doors, and roof patterns.
Quick Christmas Ornament Comparison
| Craft | Best age | Approximate activity time |
|---|---|---|
| Salt dough handprint | 3+ | 20–30 minutes |
| Popsicle stick tree | 4+ | 15–20 minutes |
| Paper snowflake | 5+ | 10–15 minutes |
| Reindeer handprint | 3+ | 15–20 minutes |
| Yarn-wrapped star | 5+ | 15–25 minutes |
| Pom-pom ornament | 4+ | 5–10 minutes |
| Pipe cleaner candy cane | 5+ | 10–15 minutes |
| Personalized photo ornament | 4+ | 15–20 minutes |
| Gingerbread house ornament | 5+ | 20–30 minutes |
Times are estimates for hands-on activities and may not include preparation or drying.
Fun Grinch Day Crafts for Kindergarten and Elementary Students
Grinch Day is a festive classroom theme inspired by Dr. Seuss’s How the Grinch Stole Christmas! Teachers often use the story to explore kindness, friendship, feelings, and generosity.
These three activities combine holiday crafting with meaningful learning opportunities.
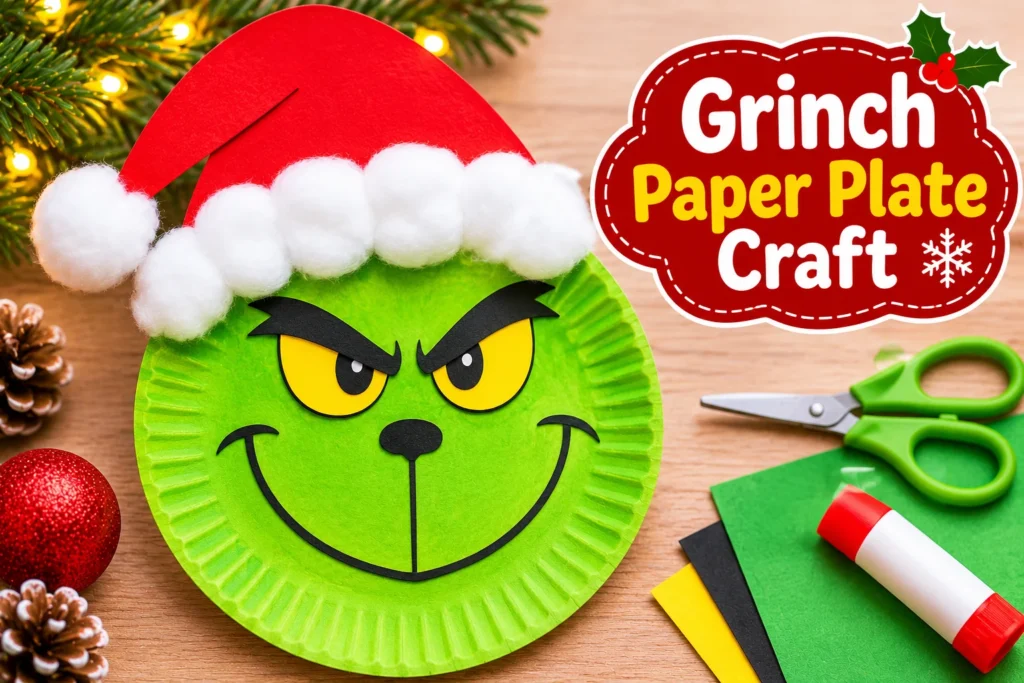
10. Grinch Paper Plate Craft
Best for: Ages 4–8
Time: 15–20 minutes
This character-inspired paper plate activity is a simple option for a Christmas classroom celebration.
Materials: Paper plates, green washable paint, colored construction paper, markers, and glue.
Instructions:
- Paint the paper plate green and let it dry.
- Cut paper shapes for eyes, eyebrows, and a smile.
- Glue the facial features onto the plate.
- Add a festive paper hat if desired.
- Display the finished artwork around the classroom.
Learning activity: Ask children to describe the character’s expression and discuss how feelings can change.
11. Grinch Growing Heart Kindness Craft
Best for: Ages 4–9
Time: 15–20 minutes
This heart craft connects seasonal creativity with a lesson about caring for others.
Materials: Red construction paper, white cardstock, scissors, markers, and glue.
Instructions:
- Cut three red hearts in different sizes.
- Arrange them from smallest to largest.
- Glue the hearts onto a sheet of cardstock.
- Ask children to write or draw a kind action on each heart.
- Display the artwork on a classroom kindness wall.
Kindness prompts:
- Help a classmate.
- Share a favorite toy.
- Say something encouraging.
- Thank someone for helping.
Teacher tip: Invite children to choose one action they can practice during the school day.
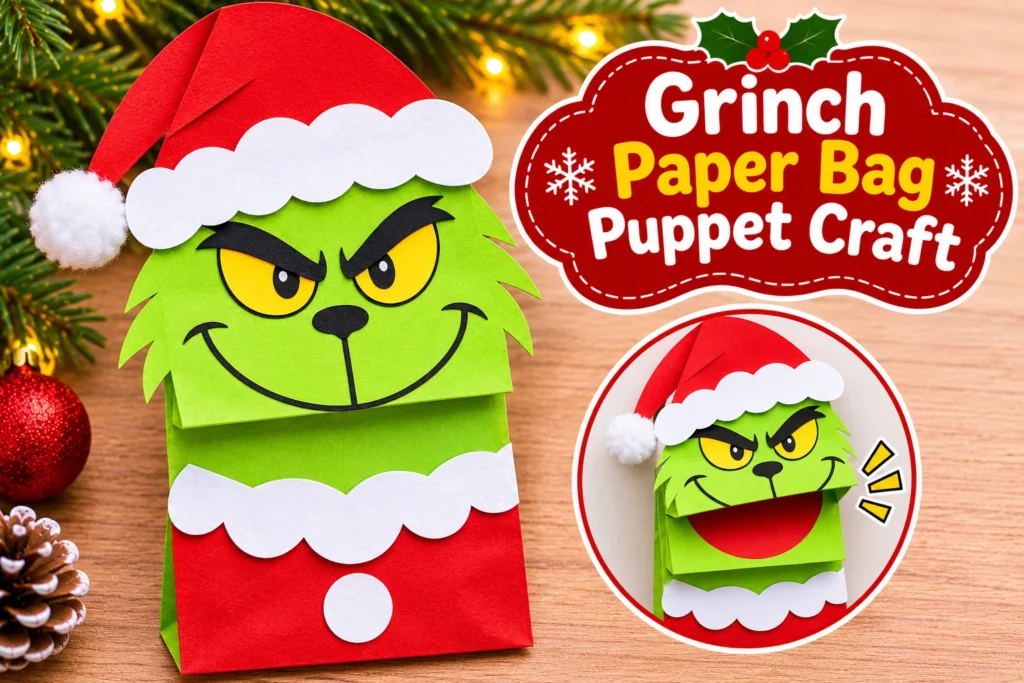
12. Grinch Paper Bag Puppet Craft
Best for: Ages 5–9
Time: 20–25 minutes
Paper bag puppets combine art, storytelling, and imaginative play.
Materials: Brown paper lunch bags, green construction paper, markers, scissors, and glue.
Instructions:
- Cover the front of a paper bag with green paper.
- Add character-inspired facial features.
- Decorate the bag with paper eyebrows and a festive hat.
- Allow the glue to dry.
- Use the puppet to create a short story or conversation.
Classroom extension: Divide children into small groups and invite them to perform a kindness-themed puppet show.
These activities can also support story comprehension when students discuss characters, actions, and changes in behavior.
Creative Earth Day Poster Ideas for Kids
Earth Day is observed annually on April 22. It provides an opportunity to teach children about protecting nature, reducing waste, and caring for their surroundings.
Simple art activities help younger students explore environmental messages in a visual and memorable way.
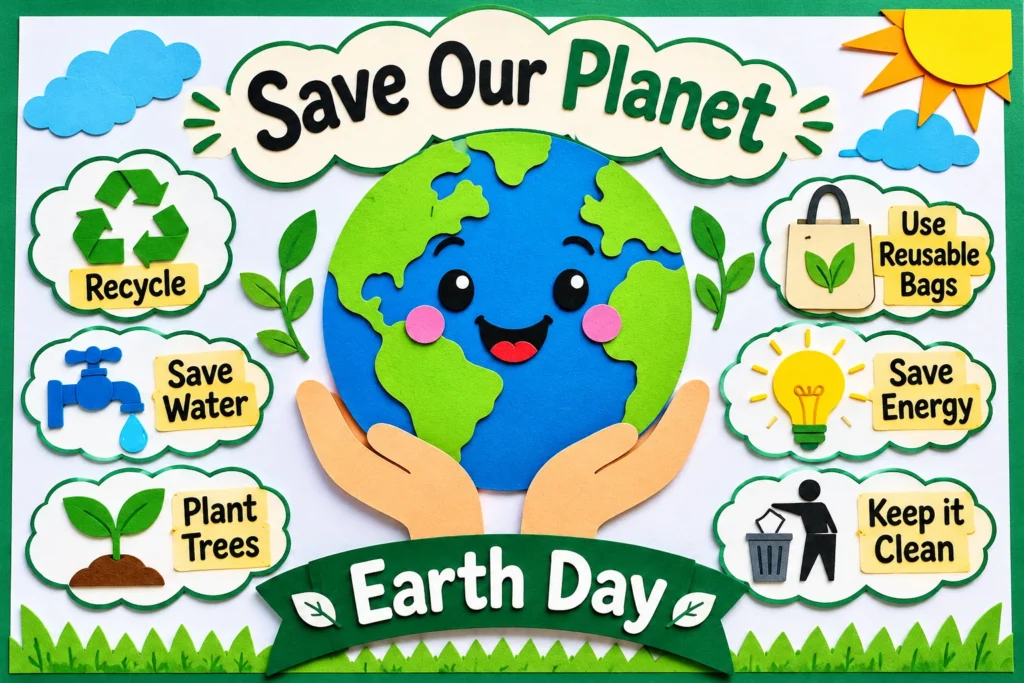
13. Save Our Planet Earth Day Poster
Best for: Ages 4–10
Time: 20–30 minutes
A colorful Earth drawing is one of the easiest Earth Day poster ideas for preschool and elementary classrooms.
Materials: White poster paper, blue and green crayons, markers, and pencils.
Instructions:
- Draw a large circle in the middle of the poster.
- Color the oceans blue and the land green.
- Add trees, flowers, or small hearts around the planet.
- Write the slogan “Love Our Planet.”
- Decorate the background with additional nature illustrations.
Teaching connection: Discuss simple ways children can care for their environment, such as using less paper and avoiding litter.
14. Reduce, Reuse, Recycle Poster
Best for: Ages 5–10
Time: 25–35 minutes
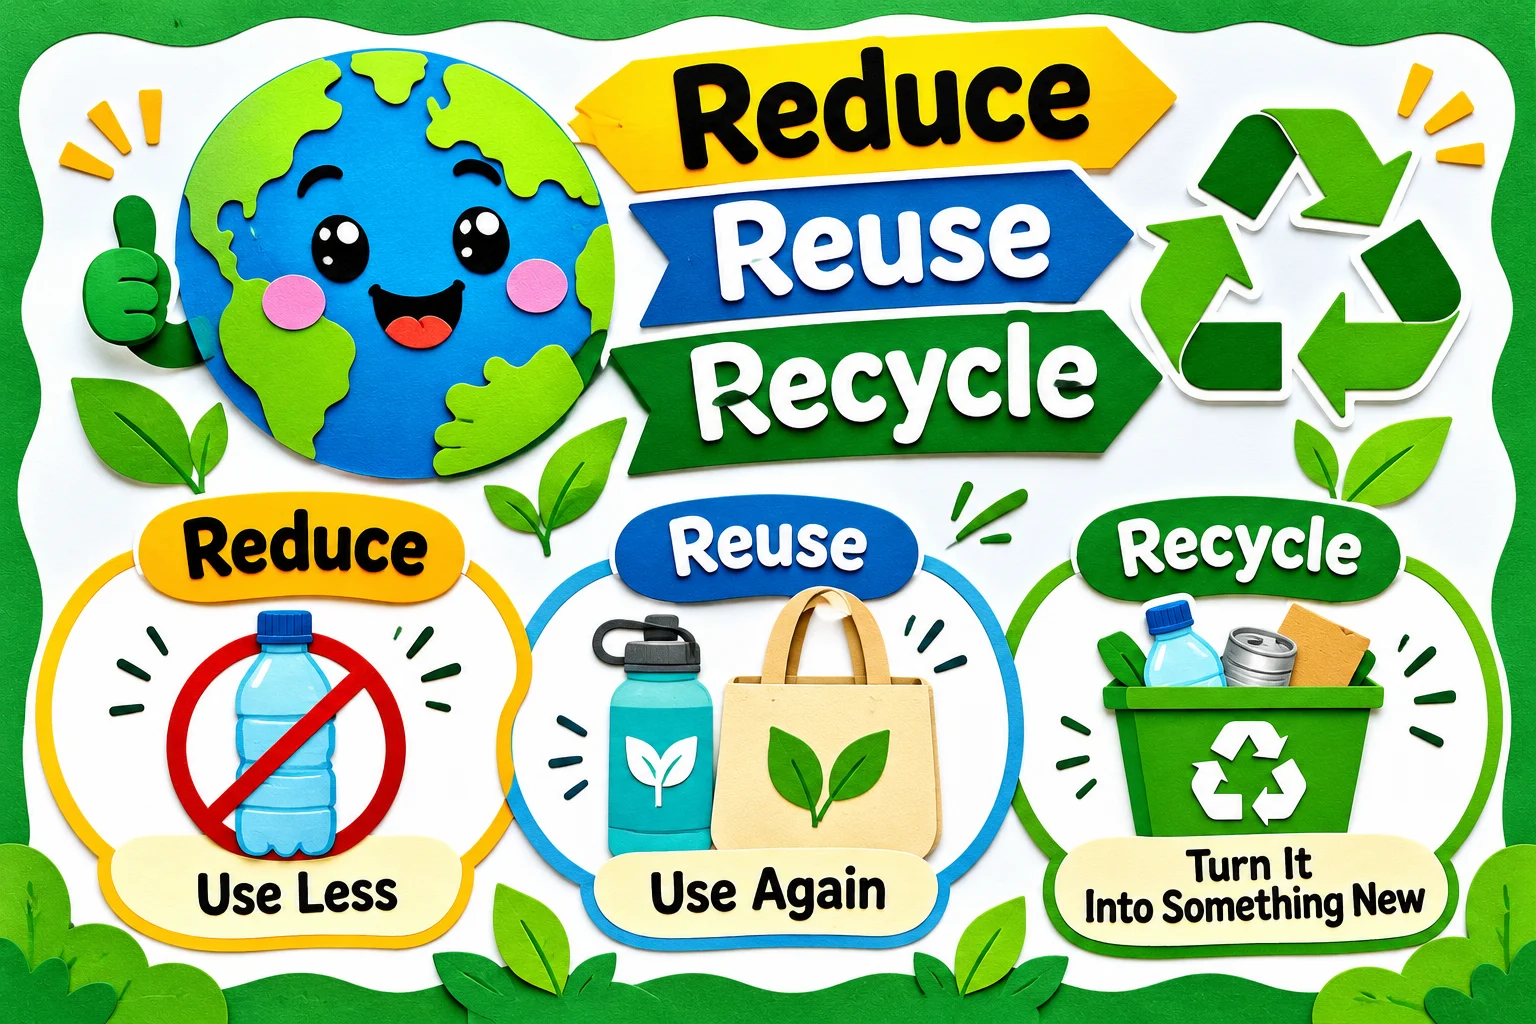
This poster activity introduces children to three important environmental actions.
Materials: Poster board, colored pencils, old magazines, glue, and construction paper.
Instructions:
- Divide the poster into three sections.
- Label the sections Reduce, Reuse, and Recycle.
- Draw examples for each category.
- Add pictures cut from old magazines.
- Decorate the poster with leaves, arrows, or nature-themed borders.
Examples children can illustrate:
- Reduce: Turn off unnecessary lights.
- Reuse: Use the back of paper for drawing.
- Recycle: Sort accepted recyclable materials according to local rules.
Classroom extension: Invite students to identify one waste-reducing habit they can practice at home or school.
15. Save the Trees Earth Day Poster
Best for: Ages 4–9
Time: 20–30 minutes
A tree-themed poster helps children explore how plants and forests contribute to a healthy environment.
Materials: Green and brown construction paper, large white paper, crayons, scissors, and glue.
Instructions:
- Cut a large tree trunk from brown paper.
- Create green leaves using construction paper.
- Glue the trunk and leaves onto the poster.
- Add birds, flowers, or woodland animals.
- Write “Protect Our Trees” across the top.
Creative variation: Let children place their names on paper leaves and write one action that helps protect nature.
The completed posters can become part of an Earth Day classroom bulletin board.
How to Make Seasonal Crafts Easy for the Whole Classroom
When planning activities for a large group of children, preparation is just as important as choosing an attractive project.
Use this simple four-step method.
1. Choose Age-Appropriate Projects
Select activities that match children’s developing skills.
Preschoolers may enjoy decorating precut shapes, finger painting, and assembling simple paper designs. Older elementary students can often manage more detailed cutting, wrapping, and construction tasks.
2. Prepare Materials Before the Lesson
Place supplies into individual trays or small classroom stations.
Precut difficult shapes, organize markers and glue, and prepare a completed example to help students understand the activity.
3. Demonstrate One Step at a Time
Young children often find it easier to follow short demonstrations than long instructions.
Show the first step, let students try it, and then introduce the next step.
Encourage creativity rather than expecting every finished project to look exactly the same.
4. Create a Display and Sharing Area
Finished artwork can decorate classroom bulletin boards, holiday trees, or hallway displays.
Invite children to explain what they made, why they chose certain colors, or what their project represents.
For Christmas activities, provide an inclusive seasonal alternative for children whose families do not celebrate the holiday.
Safety reminder: Supervise scissors, glue, small decorations, paint, and other supplies. Adults should handle hot glue, ovens, and sharp tools. Always check for age suitability, material allergies, and potential choking hazards.
Frequently Asked Questions
What are the easiest Christmas ornaments for preschoolers?
Paper candy canes, large pom-pom decorations, precut cardboard ornaments, and handprint keepsakes are beginner-friendly choices. Select activities with large materials and provide close adult supervision.
How can children make handmade Christmas ornaments at home?
Children can use cardboard, paper, yarn, craft sticks, washable paint, and ribbon to create personalized decorations. Simple projects such as paper snowflakes and cardboard Christmas trees require relatively few supplies.
What are the best Grinch Day activities for kindergarten?
Paper plate character crafts, growing heart activities, themed read-alouds, puppet making, and kindness discussions are useful options. Teachers can combine these into a short classroom celebration.
What supplies are best for inexpensive seasonal crafts?
Construction paper, recycled cardboard, glue sticks, crayons, washable markers, craft sticks, and yarn are versatile materials that can be used for many different projects.
What are some simple Earth Day poster activities?
Children can draw the Earth, create tree posters, illustrate recycling actions, or make collaborative artwork using colorful paper. Short slogans and clear pictures work especially well for younger students.
How do seasonal crafts help children learn?
Craft activities create opportunities to practice fine motor skills, follow sequences, identify colors and shapes, solve simple problems, and express ideas creatively. Teachers can also connect projects with reading, science, and social-emotional learning.
Final Thoughts
Creating memorable seasonal activities does not require expensive supplies or complicated planning. A few basic materials and a little imagination can turn an ordinary classroom lesson into a creative experience.
From personalized Christmas ornaments and Grinch-inspired kindness crafts to colorful Earth Day posters, these 15 ideas offer children opportunities to make, decorate, explore, and share.
Choose activities that suit your children’s ages, keep instructions simple, and encourage them to experiment with their own designs. The best projects are not always the most elaborate—they are the ones children enjoy creating and feel proud to take home.